The printhead is responsible for providing the desired print and transfers the ink from one page to another page. If you have been using a printer for quite some time and haven’t cleaned the printhead, then it becomes clogged and as a result, it fails to print. Sometimes, your printer can be completely damaged and you might be looking for Printer Repair Near Me.
Fortunately, you can quickly clean the printhead with some easy techniques. Here, we have come up with some top-notch hacks that will help you to clean your printhead on your own.
Why is it Essential to Clean the Printhead?
According to the experts, you must clean the printhead after every two months otherwise you might have to compromise with the quality. Also, if you notice a message telling you that no ink is passing through the paper but the ink cartridge is full, then most probably you are dealing with the printhead error.
Now, before you start the cleaning procedure, ensure that you are using genuine printer cartridges. Else, you might have to go to the printer repair centre. Also, make sure that the replaceable product fits perfectly your printer.
Expert Ways to Clean the Print Head
Most of the time, with the printer’s in-build self-cleaning software, you can quickly clean the printhead. However, if it doesn’t work for you, you are advised to manually clean the printhead. Let’s get to know more about these procedures.
1. Use the Self Cleaning Procedure on Windows
In the beginning, tap on the Start icon and then proceed to the bottom left corner of the screen and tap on the Windows logo. Enter ‘control panel’ within the given field as well as press the Enter key. Double-click on the first search result to open the Control Panel.
Under the Control Panel, go to the right side and tap on the ‘Devices & printers’ option. If you use categories view, then tap on the ‘View Devices & Printers’ option. Proceed to the Printer menu. Under here, you should locate and right-click on the printer that you wish to clean. Now, if you use a trackpad instead of a mouse, you are advised to press the right side of the trackpad to view the printer menu.
On the next page, from the drop-down and tap on the Properties option. Within a few seconds, a pop-up window will appear on the screen. Under here, hit the Maintenance button. Furthermore, tap on the Tools button. Go to the Clean Headers tab and click on the Cleaning button. Then, follow the on-screen instructions to complete the rest of the procedure. When finished, print a test page to make sure that the cleaning procedure completes successfully.
2. Use Self-Cleaning Software on Mac
First, go to the top-left corner of the display and tap on the Apple menu. Instantly, a drop-down menu will appear on the screen. Choose System Preferences from the Context menu. Select Printers & Scanners from the next window. Go to the left column on the next page and choose the printer for which you wish to run the self-cleaning software.
Afterwards, tap on the Options & Supplies button. In the middle of the window, you will see this option. Move to the top of the new window and hit the Utility option. In addition, tap on the Open Printer Utility button.
Move to the Cartridge Cleaning tab and choose the cleaning option. In case you are unable to see the Cleaning option, it means your printer might be unable to run the self-cleaning software. In this condition, take your printer to the nearby printer repair service center.
Else, you should follow the on-screen instructions and complete the cleaning procedure. Now, you might have to print a test page to check if the cleaning procedure was successful or not.
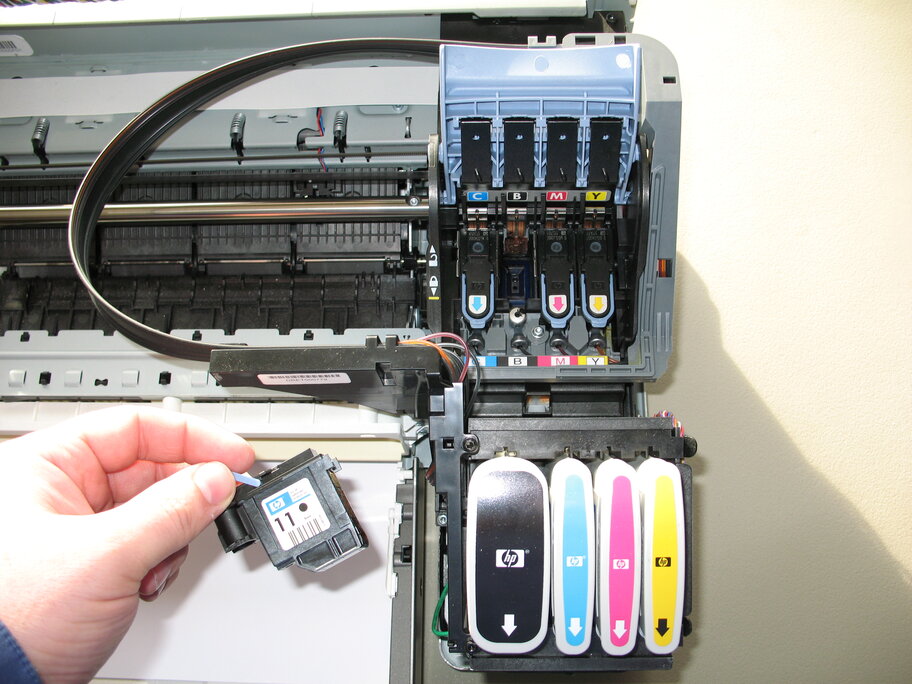
3. Manually Clean the Printhead
In order to manually clean the printhead, first, you should gather the right things.
- Paper towels
- Isopropyl alcohol
- Water
- A bowl
Now, at first, you should power off your printer and unplug the power cable from the power source. Afterwards, take out the ink cartridges. Keep in mind, you must go through the manual first and according to the manual instructions remove the cartridges.
The next thing that you have to do is to take out the printhead unit. Prepare a 50/50 stir of water and isopropyl water. Next, you should pour the combination within the bowl. Now, place the printhead within the mixture. Wait for at least 5 to 10 minutes. Next, you must rub the printhead with a paper towel.
Finally, adjust the printhead and ink cartridges to its previous place. Again, plug in the printer. Insert some white paper and print a test page.
Lastly…
These are the three top methods that you can try to clean the printhead of your printer. However, all the above ways are time-consuming and need a little bit of technical knowledge. And, if you don’t have much time to spare then search for a reliable Printer Repair Near Me, and check how they impart an impeccable service.