You just bought an Epson printer and need to install it properly on your desired system. Experts in Printer Repair Dubai guide how you can connect an Epson printer to your Windows, Mac, and smartphone and set it up successfully.
Apart from connecting your Epson printer to your computer or phone, it’s important to connect the printer to your network. Let’s discover how to connect and set up an Epson printer step by step with the help of Epson Connect Printer Setup.
Easy Steps to Install and Set up an Epson Printer on a Windows PC
Epson printers are highly recognised for their high quality and blazing-fast performance. If you are an amateur with an Epson printer setup then don’t worry. Technicians from the printer repair in Dubai have shared how easily you can install an Epson printer on a Windows computer and proceed with the setup.
However, the basic setup process is very crucial for a printer. Otherwise, the printer can’t work properly no matter how high-end a device it is. Let’s go through the steps of connecting a Windows 10 computer to an Epson printer:
The Procedure
Turn on the Epson printer as specified in the user manual. After that, connect the printer to the same wireless or Ethernet connection on which your Windows computer is active.
- Navigate to the official website of Epson printers using your PC. Make sure that you select and download the Windows version of the Epson Connect Printer Utility.
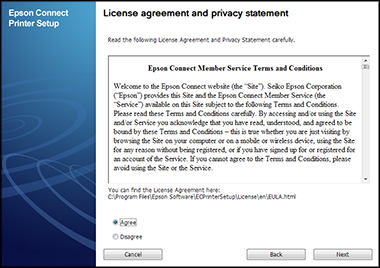
- Go through the agreement and check the box next to ‘I accept the terms in the License Agreement’ and proceed with the Next button.
- After that, hit the Install button. View your chosen product in the menu and click Next.
- Now, click on the Printer Registration option followed by Next.
- Click the Agree button and continue the procedure with the Next button.
- Check if the message ‘Register a printer to Epson Connect’ appears on the screen. Then, click the OK button.
- Based on your preference, proceed with any of the following options:
- Opt for the ‘Create an Epson Connect Account’ if you need to create a new account. Fill out the form and click Finish.
- Otherwise, choose ‘I already have an account’ if you want to register a new Epson printer with an existing account on your Windows computer. Next, fill in the ‘Add a new printer’ form and hit the Add button.
- Afterwards, click the Close button.
How to Register an Epson Printer Using Windows 7/8/8.1
Registering an Epson printer on Windows 7/8/8.1 is a bit different than on Windows 10. Here’s what professionals from a printer repair near me suggest when it comes to Epson Connect Printer Setup on these specific Windows builds:
- Switch on the Epson printer.
- Depending on your Windows operating system version, you have to launch the Epson Connect Printer Setup utility. Install the application from the official Epson website and then do any of the following:
- On Windows 7, hit the Start button and select All Programs. Next, click the EPSON option followed by Epson Connect Printer Setup. Then, opt for Epson Connect Printer Setup again.
- If it’s a Windows 8/8.1, look for Epson Connect Printer Setup using the Search charm and choose the application.
- The application will search for printers automatically. Once it detects the printer, click on Next.
- After that, choose Printer Registration and proceed with the Next option.
- The License Agreement will pop up. So, you have to agree with it and continue the process with Next.
- Now, load a stack of sheets into your Epson printer’s input tray. Click the OK button when the printing confirmation screen appears.
- Select the new registration or an existing account option when the next prompt pops up.
- Finally, go through the on-screen guidelines to provide your information and click on Add.
A setup information sheet will be printed from the device after the Epson Connect Printer Setup and registration are complete. In addition, a notification email will be sent to your shared email address. Now, you are ready to use the Epson Connect service using a Windows 7/8/8.1 PC.
How to Connect an Epson Printer to Your PC Wirelessly
Users have reported issues while trying to connect their Epson printers to their respective computers wirelessly. It’s important to connect your Epson printer and computer to the same wireless network so you can pass commands from the mobile device over the wireless network.
However, printer repair services Dubai experts have shared the steps to connect an Epson printer to a computer wirelessly:
- Hopefully, you have installed the Epson Connect Printer Setup on your computer.
- Next, you must be aware of the SSID and password of the wireless network you will use. Make sure that your computer is connected to the same Wi-Fi network.
- Now, turn on your Epson printer and press the Home button from the printer’s control panel.
- Then, navigate to the Wi-Fi setup option and select it by pressing the OK button.
- Opt for the Wi-Fi Setup Wizard and proceed with OK.
- Look for the available networks and select the required one. Make sure that you provide the right password for the network.
- Confirm the wireless connection by clicking the OK button.
By now, you should have connected the Epson printer to the computer over the wireless network.
Simple Steps to Perform an Epson Connect Printer Setup for Mac Computers
As usual, connect your Mac computer and the Epson printer to the same Wi-Fi network. After that, you can proceed with the Epson Connect Printer Setup utility on your Mac. Here’s how you can download and complete the Epson Connect Printer Setup on a Mac computer, as suggested by a printer repair service near me:
- Download the Epson Connect Printer Setup utility from the official website of Epson. Ensure that you choose the Mac version of the utility. When the download is complete, run the utility.
- After that, hit Continue.
- Again, click Continue to agree with the License Agreement followed by Agree.
- Thereafter, click the Install and Close buttons respectively.
- Choose your product and click on Next. In case the required window doesn’t show up, you need to open up a Finder window and choose Application. Then, select Epson Software. Double-click the application named Epson Connect Printer Setup.
- Select the circle next to Printer Registration and choose Next.
- After that, click OK when the ‘Register a printer to Epson Connect’ message arrives.
- Terms and Conditions of Epson Connect will pop up on your Mac screen. Check the box next to ‘I accept the Terms and Conditions’. Now, click Next.
- If you’re registering a new account, check the ‘Create An Epson Connect Account’ option and click the Finish button. Otherwise, click on the ‘I already have an account’ option and fill in the ‘Add a new printer’ form if you want to register a new Epson printer with an existing account. Next, click the Add button.
Finally, hit the Close button. You can also enable the Scan to Cloud and Remote Print services for your Epson product.
Can You Use Epson Connect Printer Setup on a Smartphone or Tablet?
You might be curious about whether you can register an Epson printer from your smartphone or tablet. Yes, you can but make sure that you connect your Epson product and smartphone/tablet to the same Wi-Fi network.
On the other hand, the printing assistant of Epson for smartphone or tablet devices is Epson Printer Finder instead of Epson Connect Printer Setup. However, experts from printer repair in Dubai have confirmed that you can enable the Epson Connect services using the above-mentioned app.
The Epson Printer Finder app is available on the Google Play Store and App Store. After you install the Epson Printer Fonder application, let’s proceed with the steps below:
- Open the Epson Printer Finder app on your smartphone or tablet.
- The page will show you all the available printers on the Wi-Fi network. Indeed, they are ready to connect to your mobile device.
- Now, tap the printer that you want to use.
- The following 3 options will appear:
- Enable Epson Connect.
- Open Printer Setup Page.
- Cancel.
- Tap on ‘Enable Epson Connect’.
- If you are a first-time user or using a device that you have never connected before, then proceed with the on-screen guidelines to make the user account and printer registration successful.
- Afterwards, tap on the Next button when the registration is done.
- Then, agree with the Privacy Statement/ Terms and Conditions.
- Load A4 or Letter size plain paper into the input tray of the Epson printer and tap the Next button.
- Make sure that you submit your account details and finally, tap on Finish.
A completion screen will appear and a setup information sheet will come out from the Epson printer. Moreover, you will receive a notification email at the email address you shared before.
Wrapping up…
Professionals from Printer Repair Dubai suggest keeping your printer’s driver and firmware updated. Indeed, this can solve most of the underlying issues with your printer’s connection, function, and overall performance. Hopefully, the guide smoothens your experience with the Epson Connect Printer setup utility and its use.